This section is meant to provide practical assistance with processes or topics we've noticed people have problems understanding or using.
Because some of the topics are complex, this page is long. To navigate it, use the links below to jump to the topic of choice. At the end of each section you will find a link to jump back to the top of the page. There are many images provided as aids; you can enlarge any image by clicking on it.
Ancestry.com
- Requesting an invitation to see the family tree
- 1st Steps when invited to the tree (IMPORTANT)
- Navigating the family tree
- Adding comments, photos, stories, and more to the tree
- How does Ancestry's autosomal DNA test work? (coming summer 2014)
- Understanding my DNA results? (coming summer 2014)
Ancestry.com - Requesting an invitation to see the tree
Our Pionke-Walczyk working tree on Ancestry.com contains more details and documents than you'll find on the blog. We'd love to tell you to just visit it but it's not quite that simple.
If you're not an Ancestry.com member, we have to issue you an invitation to view the tree. This is easy! Simply send us a request using the Contact Form on this page. If we don't know you, please tell us how we are related and/or the nature of your interest in our tree.
If you're already a member, you can view the tree right now (click here) but you'll still need an invitation if you want to contribute your own photos, stories, and documents.
Jump to How To links...
Ancestry.com - 1st Steps when invited to the tree
In this section, we explain how to configure your User Settings after you are first invited to the tree on Ancestry.com. All it takes is 4 simple steps, outlined below. When done, use the other How To links to learn how to navigate and contribute to the tree.
You can enlarge any image by clicking on it and close the image when done viewing by clicking the X in the top right corner of the image screen.
Step 1: Create a Free Account
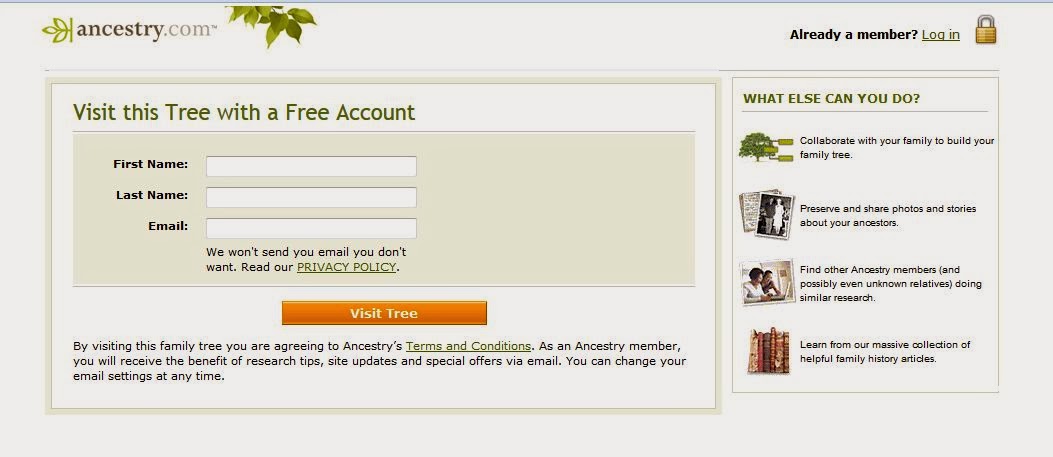
When we invite you, you will receive an email from Ancestry.com. The link in your email will take you to a page at Ancestry.com inviting you to create a Free Account. Just enter a first and last name (feel free to use initials) and email address and click Visit Tree.
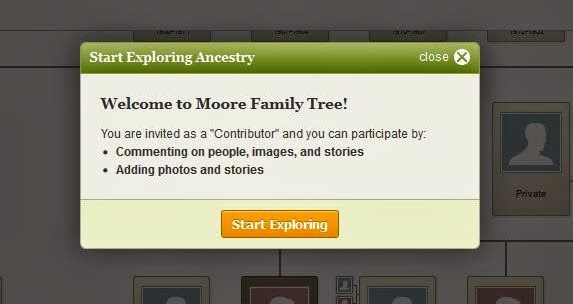 Step 2: Welcome
Now you get a Welcome popup inviting you to explore the tree, so click on Start Exploring to see the tree.
Step 3: Choosing your Username and Password
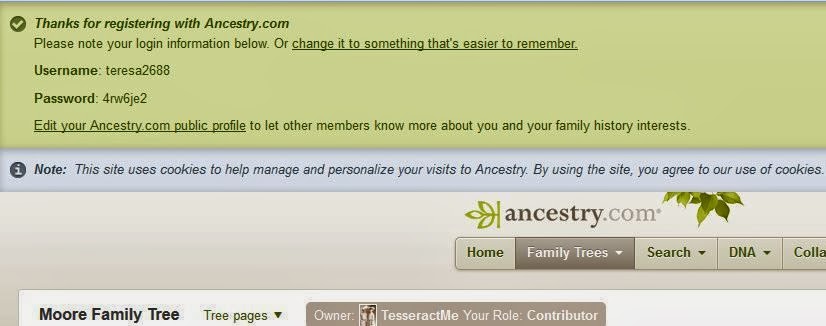 There is a giant green bar at the top of the screen listing a Username and Password that Ancestry.com generates for you. You need to change them to something you will remember.
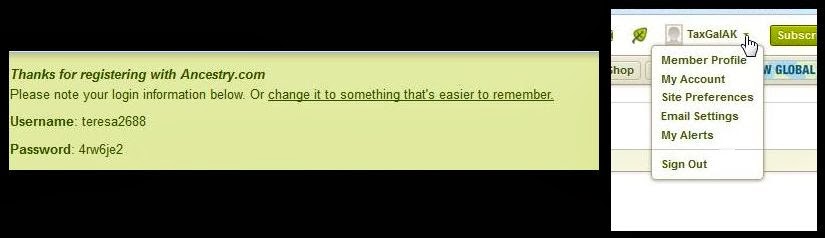 If you haven’t accidentally closed the green bar, click on Change it to something that’s easier to remember.
If you have, click on your username at the top right corner of the screen and choose My Account.
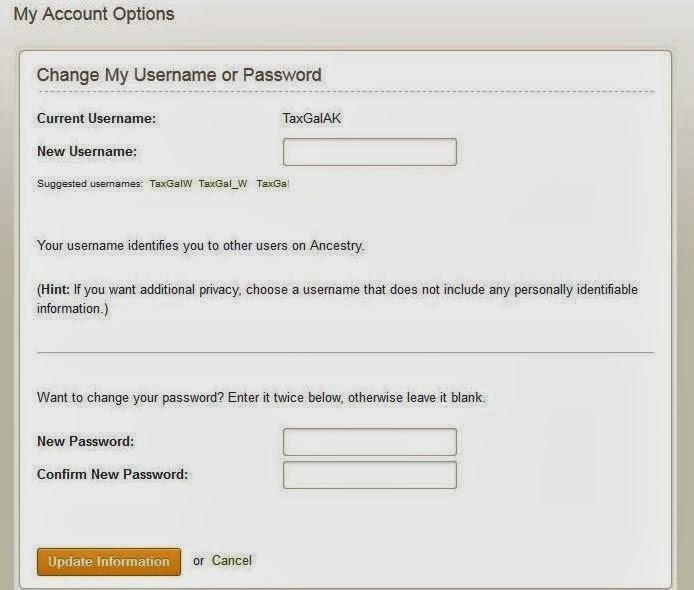 Either will take you to the window shown here. Enter new username and password, then click Update Information.
 Step 4: Getting Back To The Tree
 Now you have created a user account on Ancestry.com and set your username and password to something you can remember, so it’s time to go look at the tree. There is a menu across the top of your screen. Click on Family Trees and choose Pionke-Walczyk working tree to go to the main tree page.
Jump to How To links...
Ancestry.com - Navigating the family tree
Family trees on Ancestry.com have two parts: the tree image (“Tree”) and personal profile pages (“Profiles”).
The “Tree” is exactly what you imagine when you think of a family tree – a series of boxes and lines showing how people are related to each other. While it can be manipulated to show different sections of the tree in different views, basically it is a pictorial representation of the entire family.
“Profiles” are a series of pages that hold the facts, photos, videos, and stories for each individual person. Each profile page is specific to that one person, although they do provide links and some basic information on the members of that person’s immediate family (parents, siblings, spouses, and children).
In both sections, there are multiple options for viewing, navigating, and exploring the family tree. On this page, we hope to help you understand how navigate between and within them as feedback has shown us that is what causes the most confusion to our tree guests. You can read the whole thing through or just use the quick links below to jump to the sections that you are interested in.
You can enlarge any image by clicking on it and close the image when done viewing by clicking the X in the top right corner of the image screen.
Tree Layout - What am I looking at?
Tree – Understanding the People Boxes
Tree – How to look at different parts of the tree?
Tree – I can’t read what the boxes say
Tree – Views: Family vs Pedigree
Tree – Searching
Tree – Printing the tree
Profiles – What are they and How do I get to them?
Profile Layout – What am I looking at?
Tree Layout – What am I looking at?
When you first logon to Ancestry.com, you will be in the “Tree” area. Let’s use this image to break down the layout into understandable areas:

- Menu: at the top is the Ancestry.com menu
- Tree Views: on the upper left are two buttons that allow you to switch between Pedigree and Family Views
- Search Box: on the upper right is a search box that lets you find specific people in the tree
- Toolbar: on the left side this is a bar with buttons that allow you to Zoom, Print, find the Home Person and Return to the last person looked at
- Navigation Tool: on the bottom is a mini window with a green rectangle; it indicates what section of the tree is currently showing on your screen
- Boxes: all the boxes in the background are people on the family tree
Tree – Understanding the People Boxes
Each person in the family is represented on the tree by a color-coded box: blue for boys and pink for girls. Each generation in the tree is on its own level to make it easier to identify how people are related.

When you create a tree, you set a Home Person. By default, the tree will display the Home Person’s Tree – their children, parents, grandparents, etc. - rather than that of any siblings, in-laws or whoever.
The person whose tree is being shown – the Current Person – will always show up in brown.
You may see tiny blue/pink boxes to the side of some of the people boxes. When clicked, the view will switch to the family tree of the person the boxes are attached to and that person will become the Current Person.
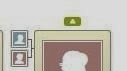 In the Tree view you will never see more than 6 generations at once. To expand the tree up or down on a specific line, just click the little green arrow on top (or bottom) of a person. If there is no green arrow, then there are no further people on that line.
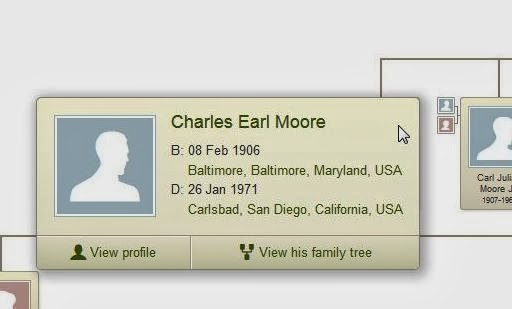
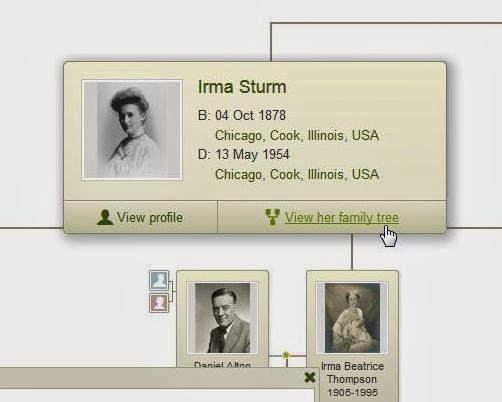 If you move your mouse over a person, a mini-profile box will pop up giving the basic information on the person and the options to View Her Family Tree or View Her Profile. The first switches the tree to showing that person’s direct ancestors and descendants. The second takes you to the Profile page for the person.
Jump to Navigating Ancestry links ...
Tree – How to look at different parts of the tree?
This tree is big so you have to maneuver to see different areas of it. There are two options for scooting the tree around..
Option 1: Grab and Move

Option 2: Use the Navigation Tool
The Navigation Tool shows the currently opened six generations of your tree. An easy method to move from one end of the tree to the other is to simply click on the green rectangle in the Navigation Tool (your pointer will turn to a hand) and scoot it to the other side.

Tree – I can’t read what the boxes say
You might want to consider reading glasses … Just kidding! Again you have two options.
 Option 1: Move your mouse over the person
When you hover your mouse pointer over a person box, a mini-profile will pop up giving you the basic information on that person in a much larger font.
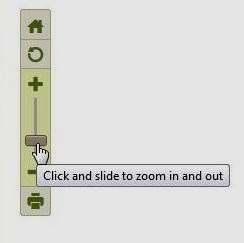 Option 2: Use the Zoom options
On the left side of the screen you will find the Toolbar. You can either click on the + or – signs or you can move the slider up and down to zoom in and out .
Jump to Navigating Ancestry links ...
Tree – Views: Family vs Pedigree
So far, all the directions provided have used Family View images as examples because that is the default layout for viewing the tree. Family View is the traditional family tree layout – a mix of boxes and lines. There is a second viewing option available – Pedigree View.
While both views show multiple generations in a tree, there are two main differences. First, Family View shows many branches of your tree (cousins, in-laws, etc.) while Pedigree View shows only the direct ancestors and descendants. Second, in Family View, you find the youngest generation on the bottom of the screen and the oldest on the top. In Pedigree View, the youngest generation is located on the left side of the screen and the oldest on the right.
If you are trying to go straight up a line, Pedigree View is the best option. If you want to look at siblings and their families, use Family View.


Jump to Navigating Ancestry links ...
Tree – Searching


To search by name, simply type the name into the Search Box. Be aware that the results that pop up below the search box may include a scroll bar on the right side to slide up and down looking for the correct person; we have many ancestors with the same names.
To search by looking through the list of names, hover your mouse over the Search Box and click on List of all people when it appears. A list of everyone in the tree appears, grouped by first letter of the last name. You can filter the list by clicking on the alphabet at the top. This is particularly useful with the more complex names.

Jump to Navigating Ancestry links ...
Tree – Printing the tree
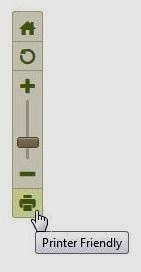 You have the option to print the tree when either in Family View or Pedigree View. The problem is that both views only print the generations currently showing – so no more than six – and there at least fourteen in our tree.
If you really want a copy, I suggest you use the Pedigree View as you’ll be able to see more details while using less paper. The printer icon is found on the Toolbar to the left of the screen. Simply click Print and you will be taken to a printer-friendly preview page to see what will print.
Jump to Navigating Ancestry links ...
Profiles – What are they and How do I get to them?
 There is no one Profile area like there is a Tree area. The Tree is a single visual unit listing the entire family. Profiles are web pages specific to an individual person that hold all the information we have about them – facts, pictures, stories, and basic info on immediate family members.
To access a person's Profile, hover your mouse over the person in either Family Tree or Pedigree View and click View Profile.

Jump to Navigating Ancestry links ...
Profile Layout – What am I looking at?
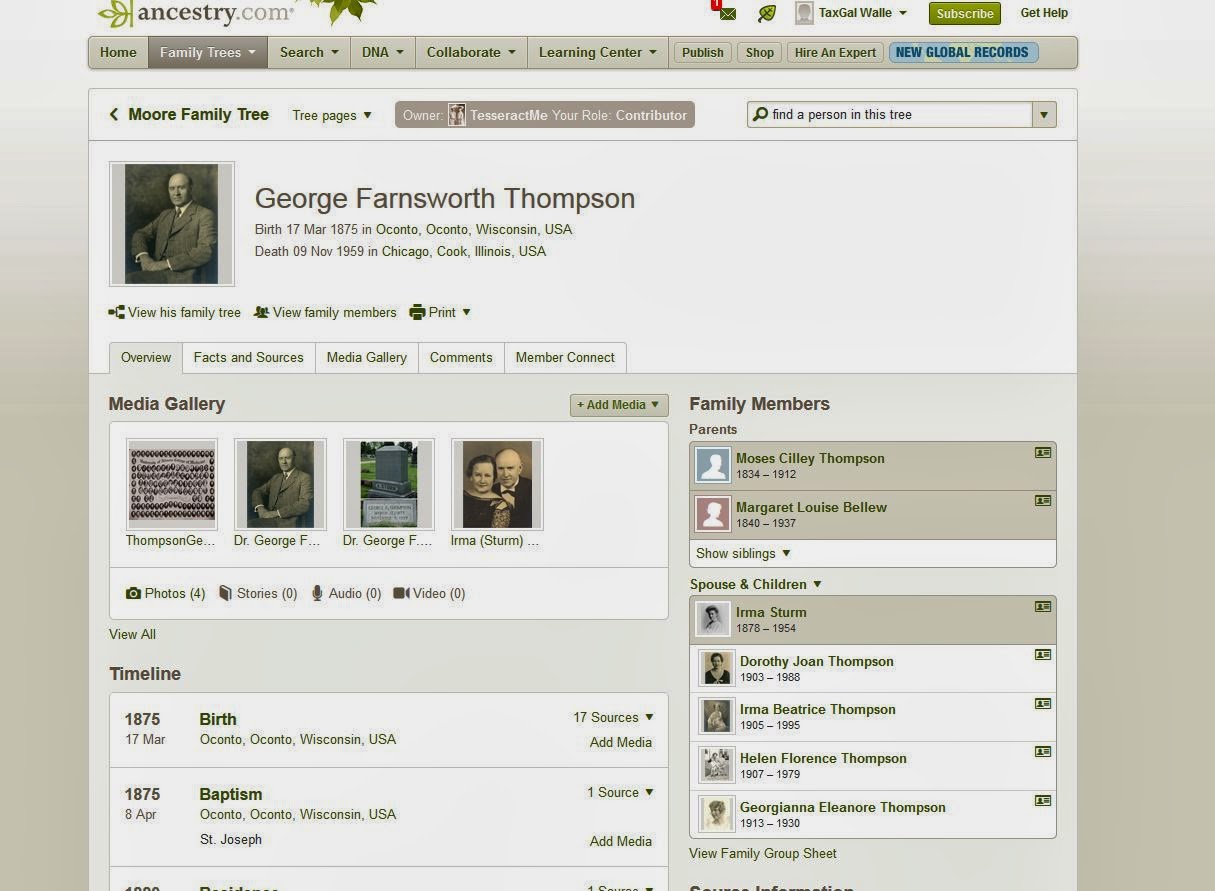
The Profile page is laid out into two main areas – the Header and Body sections. The body section breaks down further into five subsections: Overview, Facts and Sources, Media Gallery, Comments, and Member Connect.

The Header section is at the top of every profile page, regardless of which Body subsection you are looking at. It provides the person’s name, birth date and location, death date and location, and image, if one is available. It also provides links for Searching Records and expanding the section to View Family Members.
The Body section is basically everything you’ll see below the Header. You navigate between the five subsections of the body by clicking on the tabs (Overview, Facts and Sources, Media Gallery, Comments, and Member Connect). When you first open a Profile, you will be in the Overview tab.
The Overview tab is just what it sounds like, a quick overview of the person’s entire life. It is broken into two columns: left and right. On the top of the left side, you will find a quick preview of the Media Gallery contents. Below that is the Timeline, which gives a chronological list of all the facts collected for this person by date and provides links to the sources for that information. Last, you will find any Comments that have been posted about this person or information provided for them. The right side of the Overview tab starts with a Family Members section; Parents, Spouse, and Children are listed by name and birth and death years are provided. Below that area is Source Information which lists key sources of information for the facts provided, such as Archdiocese of Green Bay Archives Film. And last is a Web Links section that includes links to any external websites that involve the person.

There are two links in the Family Members section that deserve extra mention. First there is a link under parents that can be used to Show Siblings of the person, which is incredibly useful. Second, there’s a second link provided below the children that allows you to view the Family Group Sheet, which gives a nicely laid out view of the immediate family.


The Facts and Sources tab provides a detailed listing of and links to all specific records used to support each fact in the person’s life. It provides slightly more information than the Timeline in that you can click on links to view transcriptions or images of the original records.

The Media Gallery is also broken down into subsections: All Media, Photos, Stories, Audio, and Video. Simply click on the section you are interested in to view the contents available.

The Comments section is where people leave information about the person. Some share memories, brief stories, links to articles. Others leave corrections or contradictory information they have learned in their research. Pretty much it’s an area where anyone can quickly share something they want known or remembered about that person. We highly encourage you to use it to share your memories with everyone.

And last, the Member Connect section lets us see the trees of other people researching the person. It’s a really useful tool to see just how many relatives are out there looking for the same people. Unfortunately, you can’t look at their trees unless you have purchased a subscription to Ancestry.com.

Jump to Navigating Ancestry links ...
Jump to How To links...
Ancestry.com - Adding comments, photos, stories, and more to the tree
There is nothing we value more than people sharing their memories and mementos of our family with us. Pictures, videos, stories, recordings … all these help to bring a person back to life for those who knew them and introduce them to those who didn’t. So, please, do take the time to share whatever you can – even if it’s just a one-sentence memory about someone.
Ancestry.com provides a number of methods for you to share on the family tree and we’ll go over them in this section. You can upload photos from a file on your computer. You can record yourself telling a story in either video or audio. You can write a comment or story. Or you can upload a document that you typed up or scanned and stored on your computer.
The only thing you cannot do is upload existing video and audio files you have stored on your computer but I assure you that if you are willing to share, we want a copy of it. So please contact us about what you have.
You can read the whole section through or just click on the links below to jump to the area you’re interested in.
You can enlarge any image by clicking on it and close the image when done viewing by clicking the X in the top right corner of the image screen.
Add - Document
Add - Comment
Add - Story
Add - Photo
Record - Audio
Record - Video
Add - Document
A document can be anything you want to share – a story, an article, an announcement, a poem, a 50th anniversary napkin. How you share it really depends on what format the document is in.
If you took a picture of the item you want to share, then you have an image file. Follow the directions under Add - Photo to upload it.
If you scanned the item into your computer, you were given the option to save it as an image or a document.
- If it was saved as an image, again, follow the directions under Add - Photo to upload it.
- If you saved it as a document, you saved it as a PDF file (one that opens using Adobe Reader). Follow the directions in the Add - Story section for Upload Story or Document to upload the scanned document on the family tree.
If you found an article or book or picture online that you want to share, please DO NOT upload those to Ancestry.com without contacting us first and providing us a link to the item. We do not want to violate any copyright laws and we will be happy to research the site’s terms of use for you and let you know if you can upload it or not.
If you have no idea how to find the document or picture that you put on your computer and no children or grandchildren to help you find it, email us. We’re pretty good at talking you through the process.
Jump to Adding to Ancestry links ...
Add - Comment
The Comment section is usually used to write a brief memory, a short story, or to comment on details in the Profile. For example:
- “Grandpa Thompson did the crossword puzzle every morning before going to work”
- “You listed that he got married at St. Adolphus, but it was St. Josephs”
- “I never knew that about Grandpa Thompson – that’s amazing!”
To add a comment, click on the Comments tab in the Profile. Type the subject of your comment in the Subject line (i.e. “Avid Puzzle Doer” or “Correction”). Then type your comment in the Comment area. You are limited to 5000 characters, which is about 10 short paragraphs.

If you want to share a detailed story and be able to edit what you are typing to include different fonts and styles, use the Add - Story option instead.
Jump to Adding to Ancestry links ...
Add - Story
There are two ways to add a story to the family tree on Ancestry.com. The first is to type the story online. The second is to upload a story from your computer. Before I explain them, I want to let you know that you can use the options described here to upload any documents or share any information on the person that you think people might enjoy or be interested in – like recipes, poems, invitations, newspaper articles or announcements.
Type Story:
To type the story online, click on the Media tab and click Stories on the green menu bar. Now, on the right side of the green bar, click the Add Story button and choose Type Story.

You can now type up your story. Options are available to change font types, styles, and sizes as well as align and indent text – just like when using Microsoft Word. Start by giving your story a Title at the top of the window. Below the Story text area, you also can also provide a brief Description of the story as well as the Location and Date it took place. If the story involves more than one person on the tree, you can click Add another person to include it in their media galleries. When done click Save Story and it will upload.

Upload Story or Document:
Many people are more comfortable typing up a story on their computer than typing it online. It gives them time to edit and re-read their text to remove errors and make sure nothing was left out. You can upload stories and documents as long as they are in one of the following formats: Microsoft Word (.doc, .docx), Notepad (.txt), Adobe Reader (.pdf) or any rich text editor (.rtf). They cannot be larger than 15MB in size.
To upload a story or document you have saved on your computer, click on the Media tab and click Stories on the green menu bar. On the right side, click the Add Story button and choose Upload Story from Computer.

Now, check the “I accept the Content Submission Agreement” box and click on Select Files. The Documents or My Documents folder on your computer should popup listing all the files you have saved. Click on the file you want to upload and click Open.


You now can put in a Title, Date, and brief Description of the story, if you want. If the story involves more than one person on the tree, you can click Add another person to include it in their media galleries. Once done, click Save and the file will upload to the tree.

And remember, we love stories but feel free to share anything about that person you think others would enjoy.
Jump to Adding to Ancestry links ...
Add - Photo
We welcome not only photos of the person and their family but also of anything related to them. Some of the items in our collection include images of their homes, churches, and mementos such as bronzed baby shoes or jewelry. You can upload photos as long as they are in one of the following formats: .jpg .jpeg .png .gif .tiff .bmp. They cannot be larger than 15MB in size.
To add a photo, click on the Media tab and click Photos on the green menu bar. Now, on the right side of the green bar, click the Add Photo button.

Now, check the “I accept the Content Submission Agreement” box and click on Select Files. The Documents or My Documents folder on your computer should popup listing all your document. Find the photos section (usually by clicking Pictures or My Pictures on the left). Click on the photo you want to upload and click Open.


You now can put in a Title, Date, and brief Description of the photo, if you want. You can also choose a Category for the photo, such as Portrait, Site, Headstone, Document, or Other. If the photo includes more than one person on the tree, you can click Add another person to include it in their media galleries. Once done, click Save and the photo will upload to the tree.

Jump to Adding to Ancestry links ...
Record - Audio
You can record up to 12 minutes of audio on Ancestry.com. But to record audio, you have to attach a microphone to your computer or use a headset with a built-in microphone. They are cheap and easy to use; you can pick them up at any Best Buy.
To add audio, click on the Media tab and click Audio on the green menu bar. Now, on the right side of the green bar, click the Record Audio button.
The Record Your Family History window pops up. The top section lists possible topics to discuss, meant to help you figure out what to say. If you want to use one of their topics, click on the one that interests you – the topic will appear in the box below the list. If you know what you want to talk about, just ignore that section. Either way, the next step is to click Start Recording to get to the recording window.

Make sure your microphone or headset is plugged in. You have up to 12 minutes to talk. When you are ready, click Record and start talking. While you are talking, the Record button turns into a Stop button. Click Stop when you are done.


Now you are given the option to Review (listen to what you said), Try Again, or Save your recording.

When you are finally satisfied with your recording, click Save and a window will pop up letting you know the recording has been saved.

Jump to Adding to Ancestry links ...
Record - Video
You can record up to 12 minutes of video on Ancestry.com. But to record video, you have to have both a webcam and a microphone attached to your computer. You can pick them up at any Best Buy. The recording a video option works best when viewing the website from Internet Explorer and you will need to have your Adobe Flash updated.
To add video, click on the Media tab and click Videos on the green menu bar. Now, on the right side of the green bar, click the Record Video button.
The Record a Video window pops up. In the center of the screen you will see a request from Adobe Flash asking for access to your camera and microphone. Make sure your webcam and microphone are plugged in. Click Allow to give the access or you can’t record anything. If it works, you will see yourself on the screen. There may be a help file popup on the screen asking you to test the microphone. In the lower right corner you can click Close Help to get rid of it.

You have up to 12 minutes to record. When you are ready, click Record and start talking. While you are videotaping, the Record button turns into a Stop button. Click Stop when you are done.


Now you are given the option to Review (listen to what you said), Try Again, or Save your recording.

When you are finally satisfied with your recording, click Save.
Jump to Adding to Ancestry links ...
Jump to How To links...
Blog - How to comment on posts
Please feel free to comment on anything you read in the blog. We welcome feedback. We've had to set up some restrictions on who can post comments to protect our blog from spam, so please click below to ...
To protect the blog from spammers and trolls, we are restricting comments to "registered users". What that means is that to post on the blog, you have to provide some form of identification - basically be logged in with an email account - before you can post. If you have one of the following types of accounts, you can post comments on our blog:
- Google, includes Gmail and Blogger
- Open ID, which includes Yahoo!, Flickr, and AOL
- Live Journal
- Word Press
- AIM
- Type Pad
The directions below include a number of images. You can enlarge any image by clicking on it and close the image when done viewing by clicking the X in the top right corner of the image screen.
Posting Comments
To post a Comment, scroll to the bottom of the post you wish to comment on. You will see the Post Comment box. Please note one weird item - you will see "No Comments:" above the Post Comment box if no comments have yet been posted; just ignore it.
There are two components to the Post Comment box: a text area and a drop-down box to choose the account you will Comment As. Type your comment in the text area. Choose your account type from the drop-down box and click the Publish button. What happens next depends on which account type you chose:

Google (Gmail and Blogger)
After you click the Publish button, the Google sign-in page will load. Enter your email and password and click Sign In. You will be returned to the blog page with your comment posted.

Open ID (Yahoo!, Flickr, and AOL)
This is the trickiest of the registered user options because you have to type in a website address. When you first click the Publish button you will see the OpenID window popup, asking you to provide an "OpenID URL". That just means it wants the website of the service you will use. Just type in one of the following (depending on what you want to use) and click Continue:
- www.yahoo.com
- www.flickr.com
- www.aol.com

Now, what you see next depends on which site you entered.
If you chose Yahoo! or Flickr, you will discover that Yahoo! apparently owns Flickr. Regardless of which site you type in, after you click the Continue button, the you end up at the Yahoo! login page. Enter your email and password and click Sign In. You will be returned to the blog page with your comment posted.

If you chose AOL, its login page will load. After you click the Publish button, the and After you click the Publish button, the. You will be returned to the blog page with your comment posted.

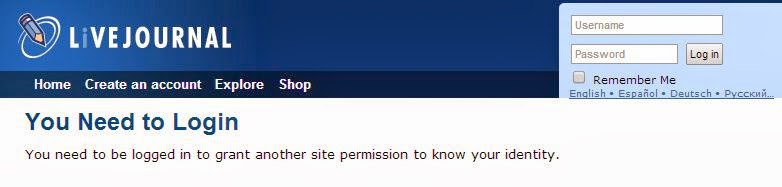
Live Journal
After you click the Publish button, the Live Journal sign-in page will load. Enter your email and password and click Sign In. You will be returned to the blog page with your comment posted.
WordPress
If you are using WordPress, after you click the Publish button a WordPress page will load and tell you that you have to be logged in to post a comment and that they won't provide you with a handy link to their website. So, hit your back button and copy the comment you typed in (so you won't lose it). Then go to http://www.wordpress.com and login with your your email and password. Then return to the blog, paste your comment into the text area, choose WordPress from the drop down box and click the Publish button. Your comment should get posted.

AIM
AIM is apparently owned by AOL. So, after you click the Publish button, the AOL sign-in page will load. Enter your email and password and click Sign In. You will be returned to the blog page with your comment posted.
Type Pad
After you click the Publish button, the Type Pad sign-in page will load. Enter your email and password and click Sign In. You will be returned to the blog page with your comment posted.

Jump to How To links...
Blog - How to submit stories, photos, videos, or suggestions
We would love to have you share your stories and pictures with us. And we welcome suggestions on how we can improve the blog to make it easier for you to use or what you would like us to write about. To protect our blog from spammers, only the authors can directly add items to the blog, our Flickr albums, and our YouTube account. So if there are any items you want us to share, we need you contact us to arrange an exchange.
Please use the Contact Form (located in the right column) to get in touch with us. We will try to respond in a timely manner.
Jump to How To links...
No comments:
Post a Comment
REMEMBER:
---------------------
You must be logged into a Google+, Gmail, or OpenID account before posting or your comment will seem to disappear when you try to post it!
(View the How-To section on posting blog comments if you need help).